Creating Recruitment Videos with VideoScribe

Recruitment is one of the main barriers in research. To tackle this issue, it’s essential to start early and plan for success. In this series we will introduce some key elements of recruitment budgeting and planning.

View our recruitment resource guides here:

Part 1: Getting Started

Part 2: Finding your participants 

Part 3: Developing a budget

Part 4: Creating Recruitment Videos


This tutorial on creating recruitment videos was developed and produced by Ruth Gebrezghi, a Participant Recruitment Programs Coordinator for CTSI. Send questions or comments to [email protected]

VideoScribe is easy to use software for creating whiteboard-style videos that you can use to create your informational videos for recruitment, retention, or education. You can download a free trial to try it out. 

The Compare UF Study used VideoScribe to create an educational study video to support recruitment:

The video tutorials below demonstrate the basic steps of using VideoScribe and offer pointers on how to use the software. Each section includes a short video and an overview of the content included in that video. You can also download the templates used in the example Compare-UF video here: VideoScribe Templates for recruitment.  

Getting started

Before you get started with your VideoScribe project, it is best to have a script or outline prepared in advance. This outline/script will help you do one of many things; this includes assisting in the recording of your narration, identifying images you need for your video, and organizing the layout of your content. For more information on creating a storyboard and/or script for your recruitment video, please click here.

Saving your project

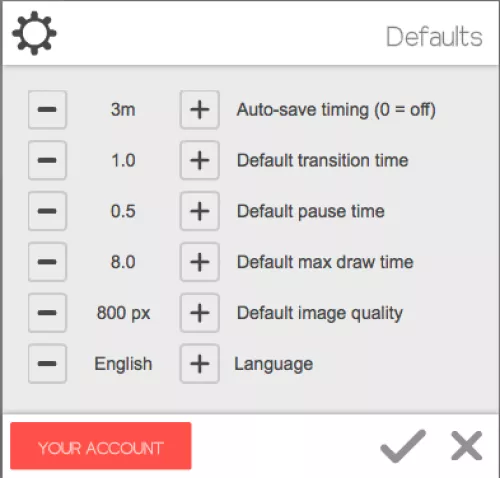
Scribes can be saved locally onto your computers hard drive or saved to the cloud. Saving scribes to the cloud will allow you to access your work using different computers, if logged into the same account. The program also has an auto save feature that will save your project every x amount of minutes. The default setting is to auto save your project every three minutes, but this can be adjusted by accessing the default scribe settings, shown here:

Overview of basic features

Basic features include:

  1. Image bank: contains thousands of royalty free svg (single vector graphic) images. These images are identified using keywords.
  2. Text: Text of varying font and colors can be added to your scribe.
  3. Graph/chart: This feature allows you to create bar, pie, and line graphs to add to your canvas.
  4. Canvas type: The color and texture of your canvas can be adjusted using this feature. Also note that a vignette can be added to your scribe.
  5. Background music: royalty free background music of varying length is available to add to your scribe.
  6. Narration: The program allows you to record a voice narration using your computers built in microphone.
  7. Hand: The hand feature allows you to select the hand and/or writing utensil you want your text and images drawn in.

More information on the basic features can be found on the VideoScribe site. 


Using the image bank

Using the image bank

VideoScribe provides hundreds of free images you can use for your scribe. Images in the image bank can be found using keywords – so be creative.

For instance, if you were creating a scribe on healthy eating tips, you’ll want to use keywords such as “vegetables” or “fruit” – an image search using the keyword “healthy” may not yield as many images (free and/or paid). Also note that images with the red line require a fee, all other images are free.

  • Free images may also be available on royalty free image sites such as www.openclipart.org  
  • Diversity: You’ll also want to be inclusive of all races and ethnicities in the images you use in your scribe. VideoScribe has included images of people of different cultures and ethnicities so use this to your advantage

Adding your own images

If you can’t find the images you need for your scribe, you can always upload saved images (.svg, .png, and .jpeg) into your scribe. Be sure to confirm that images uploaded to your scribe are royalty free. You also have the option of creating your own .svg images using third party programs such as Adobe Illustrator or Inkscape (free). VideoScribe also has a list of resources for finding additional images.

Content alignment

Content alignment

The layout of your scribe can greatly affect the viewing experience. It is generally in best practice to have your content laid out horizontally – this means the camera will seamlessly travel from one “scene” to the next, instead of moving all over the place.

More information on this topic can be found on VideoScribe.

Setting camera position

Setting camera position

The default position of the camera will be located at the center of your scribe. Images placed on the canvas may not always be located in this location, so be mindful of this. If you want to change the default position of the camera, you can do this by first selecting the images you would like viewed by the camera, and then setting that position by clicking on the “Set Camera” icon.

More information on this topic can be found at VideoScribe.

Fonts

Fonts

Your font choice is important for readability and professionalism. You should aim for simple, easy to read fonts, such as Calibri, TImes New Roman, or Garamond and make sure it is large enough to be easily read. In addition, it is best practice to be consistent--starting with one font, and finishing with another can disrupt the flow of your scribe.

Changing properties of elements

Adjusting an elements draw time, transition, and pause

Default animation time, transition, and pause times can be adjusted to your needs. To change the default settings for all scribes, you can access the “Default scribe settings” – this will change settings for all scribes.

To adjust the settings for particular elements in the scribe, click on the element property settings ­­– accessed in the timeline. Here you can increase or decrease the draw time. When doing this, you’ll want to be mindful of how fast the images are drawn out- text that is drawn too fast or too slow may affect the viewing experience of your scribe.

Image orientation

Another property of images that can be adjusted is the orientation of an image. You can flip, rotate, and mirror an image to your liking. Tip: images of people are often facing the same direction so if you’re looking to have images face each other for a particular scribe, use the mirror image of a particular drawing to have them looking at each other.

Timeline order

The order your content appears in the scribe is based on your timeline order- so be mindful of this when adding new content or re-arranging content. Make sure the point at which you want to add an image or text is selected in the timeline when adding new content to your scribe – not doing so will add content to the end of your scribe. See the video above for an example.

Adding background music and narration

Adding narration and background music

Adding narration and background music (royalty free) can be done using the narration and background music feature in VideoScribe. You can record your narration using an external or internal microphone.

While it is definitely possible to use this platform to record the narration and add background music- it is also possible to use third party video editing software such as iMovie to do this. This will allow you to record your narration on a device of your choosing (i.e. smart phone, voice recorder) and then sync the audio with the video created in VideoScribe.

Final touches

Logos

Once you’re done and ready to share your scribe, you’ll be given the option of adding a logo to your scribe when you select the “Publish your scribe video” in the top right hand corner. This logo will appear throughout the video so it’s best that you use a transparent logo.

Post-Production Editing

If there is a need for postproduction editing, programs such as iMovie, Adobe Elements, and Wondershare Filmora, can help you with this. This will allow you to remove content if needed, add additional content to an existing video, speed things up or slow things down, etc.

Hosting Options

Once you’re done and ready to share your scribe, you can post your video on websites such as YouTube, Vimeo, and/or UCSF Box, and then use the link to post on websites or distribute via email.